Green and zero-waste cleaning: DIY recipes

brooms-857508_960_720

Today’s blog post will teach you how you can easily make your own non-toxic, natural cleaning products. These are also ideal for a plastic-free zero-waste lifestyle, since they come without plastic packaging.

You will need:

  • Glass jars and glass bottles
  • Baking soda
  • White vinegar
  • Optional: natural essential oil of your choice, e.g. lemon or orange
  • Optional: liquid castile soap

Mild all-purpose cleaner

You will need:  ½ cup of baking soda       1 litre or 1 quart water   optional: natural essential oil of your choice if you want a scented cleaner (e.g. lemon or orange natural essential oil)

  1. Mix the baking soda with the water and fill into a glass bottle or spray bottle.
  2. Use like a conventional cleaner.

The baking soda has deodorizing properties, so it is ideal for all kinds of surfaces and for cleaning refrigerators, sinks, table tops, etc.

Stronger all-purpose cleaner

You will need:  ½ cup of baking soda   ½ cup of white vinegar   1 litre or 1 quart water

Mix all ingredients and fill into a bottle or spray bottle. This is a slightly stronger all-purpose cleaner and is suitable for all kinds of surfaces.

Glass or window cleaner

You will need: ½ cup of white vinegar     1 litre or 1 quart water

  1. Mix the vinegar and the water and fill into a spray bottle.
  2. Spray onto the glass or mirror as you would a conventional glass cleaner. Wipe dry with a piece of newspaper.

cleaning-268126_960_720

Floor cleaner

You will need: 1-2 cups of white vinegar     bucket of water     optional: liquid castile soap for an even stronger cleaner

Mix the vinegar into the bucket of water and mop as usual.

Drain cleaner and declogger

You will need:    ½ cup of baking soda     ½ cup of white vinegar      several litres or a ½ gallon of boiling water

  1. Pour the baking soda down the drain.
  2. Now slowly pour the white vinegar down the drain. You ought to hear a fizzing sound when the baking soda reacts with the vinegar. Let sit for 5-10 minutes and cover the drain.
  3. To finish, pour several litres or ½ to 1 gallon of boiling water down the drain.

If the recipe does not work, try it again using twice the amount of baking soda and vinegar.

Oven cleaner

You will need:   Baking soda       cornstarch      salt

To clean your oven after a spillover and to remove burnt-in stains, sprinkle baking soda and some water on the stains and allow to sit for an hour or even overnight. The baking soda ought to loosen the burnt-in stains. Remove with a damp cloth, brush or sponge.

If you want to scrub your oven or need to remove especially tough stains, try using salt. Just sprinkle some salt onto the stains (and some water if the stains are dry) and allow to sit for some time. Scrape away the stains.

To absorb grease and oil, try using cornstarch. The cornstarch will soak up the grease. Remove with a cleaning rag or damp sponge.

We have relaunched our Etsy-store!!

We have been working very hard and have now relaunched our Etsy-shop after it had been closed all summer!! 🙂 Come and have a look at our brand-new winter season products: https://www.etsy.com/shop/EcoTurtleUpcycling

Especially for the upcoming holiday and gift-giving season we have made a variety of ‘Zero-Waste’ gift-bags (from upcycled materials) which can be re-used over and over again and do not produce all the waste associated with packaging materials.

Other winter-season creations of ours include sweater cushion covers, which are always very cozy during the cold season.

And we have also made a whole series of Chinese brocade items, e.g. cushion covers, which look very elegant and stylish and are a highlight on most sofas:

More products and product lines are to be added to our shop in the next few weeks, so watch this space! 🙂 All of our products are handmade in Western Europe from upcycled materials and we usually have just one, or at the most, a few items of each product, since we only have a very limited supply of each material. So each item is virtually unique! 🙂 We only use gently pre-used materials and we source our materials from thrift shops, fleamarkets or we buy the surplus stock of industrial production or from shops that close down. Most of our creations are vegan, though some individual items may contain wool or silk (depending on what material/material-blend the item consists of which we are upcycling), but none contain leather or parts thereof.

Zero Waste: How to make glue

glue-304256_960_720

Today’s blog post will continue our series on a Zero Waste lifestyle and will teach you how to make glue, i.e. a paper glue that is perfect for most crafts made of paper and cardboard and even wood, and for most household purposes.

You will need:

  • a cooking pot, a whisk, a small glass jar for storage and a paintbrush (to apply the glue)
  • white flour
  • corn starch
  • vinegar

The flour, the cornstarch and the vinegar ought to be in a ratio of 33:33:33. Depending on how much glue you want to make, one or two tablespoons of each ought to be enough: one tablespoon of each will result in a small amount of glue – perfect if you don’t need much – and two tablespoons of each ingredient will result in a small jar – perfect if you want to make a larger crafts project and need more glue.

Instructions:

  1. Bring a cup of water to the boil (e.g. in a watercooker), then pour the boiling water into the cooking pot – or bring the water to the boil in the pot. Turn off the heat.
  2. Mix the flour and the cornstarch in a bowl. Then, using a whisk, mix it into the hot water and stir until it has a creamy consistence.
  3. Now mix in the vinegar.
  4. Your glue is finished now! 🙂 Transfer it to a clean jar and let it cool. Apply your glue with the paintbrush.

Tutorial: How to make an organizer for tools, pencils, etc.

dscn2915

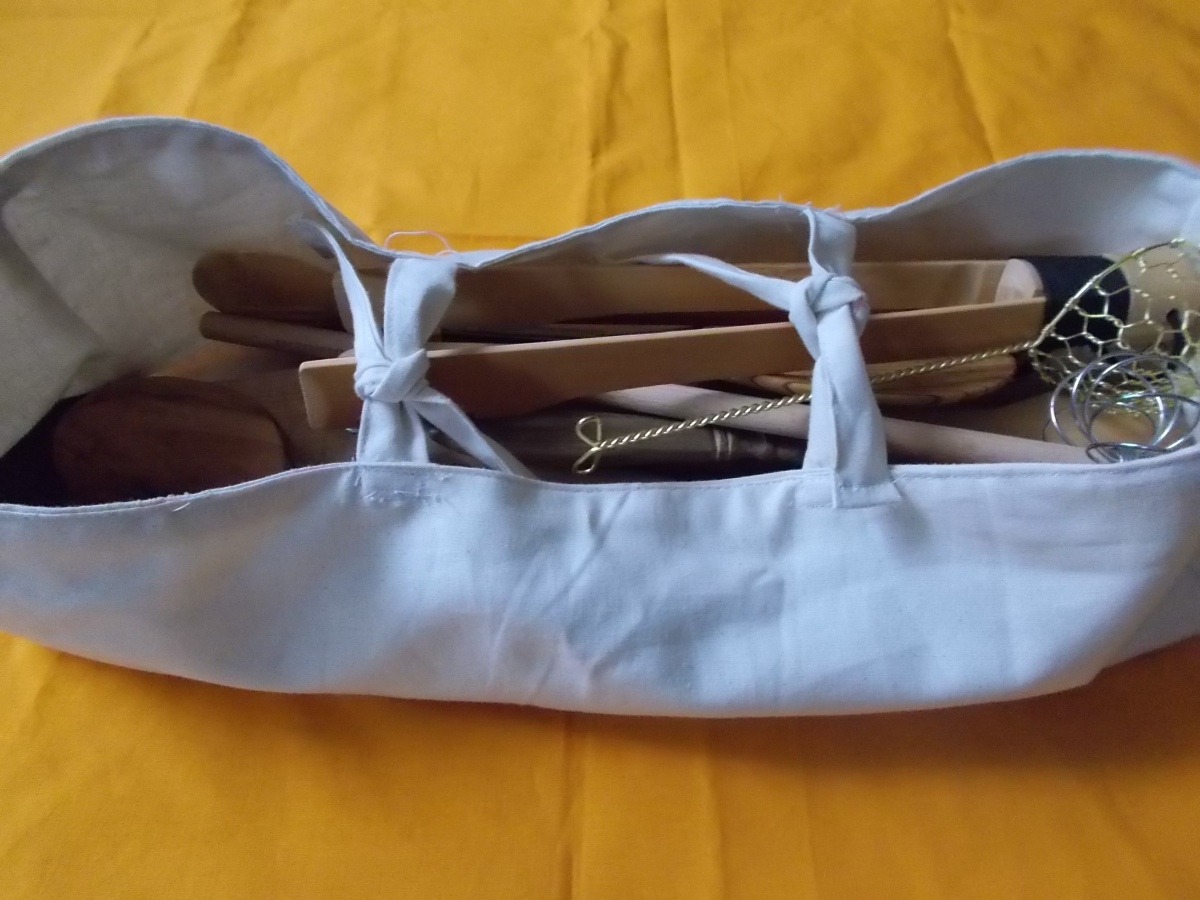
Today’s blog post will teach you how to make an organizer, e.g. for kitchen tools, pencils, stationary, other tools, etc. from a piece of fabric. You can either make it from new fabric or from a garment you wish to upcycle into something useful. 🙂

You will need:

  • a piece of fabric which must be twice as large as the size of your intended organizer (the other half of the fabric will act as lining!); or two different pieces of fabric if you want the lining to be in a different colour or pattern
  • sewing machine
  • thread, needle, scissors, pencil

Instructions:

dscn2882

  1. To determine the size of your organizer, start by placing the tools which you want to store in it on the fabric. Your piece of fabric ought to be a few centimeters longer than the tools. Determine the width of your piece of fabric by adding the intended height of your organizer to both the left and right of your tools.

dscn2887

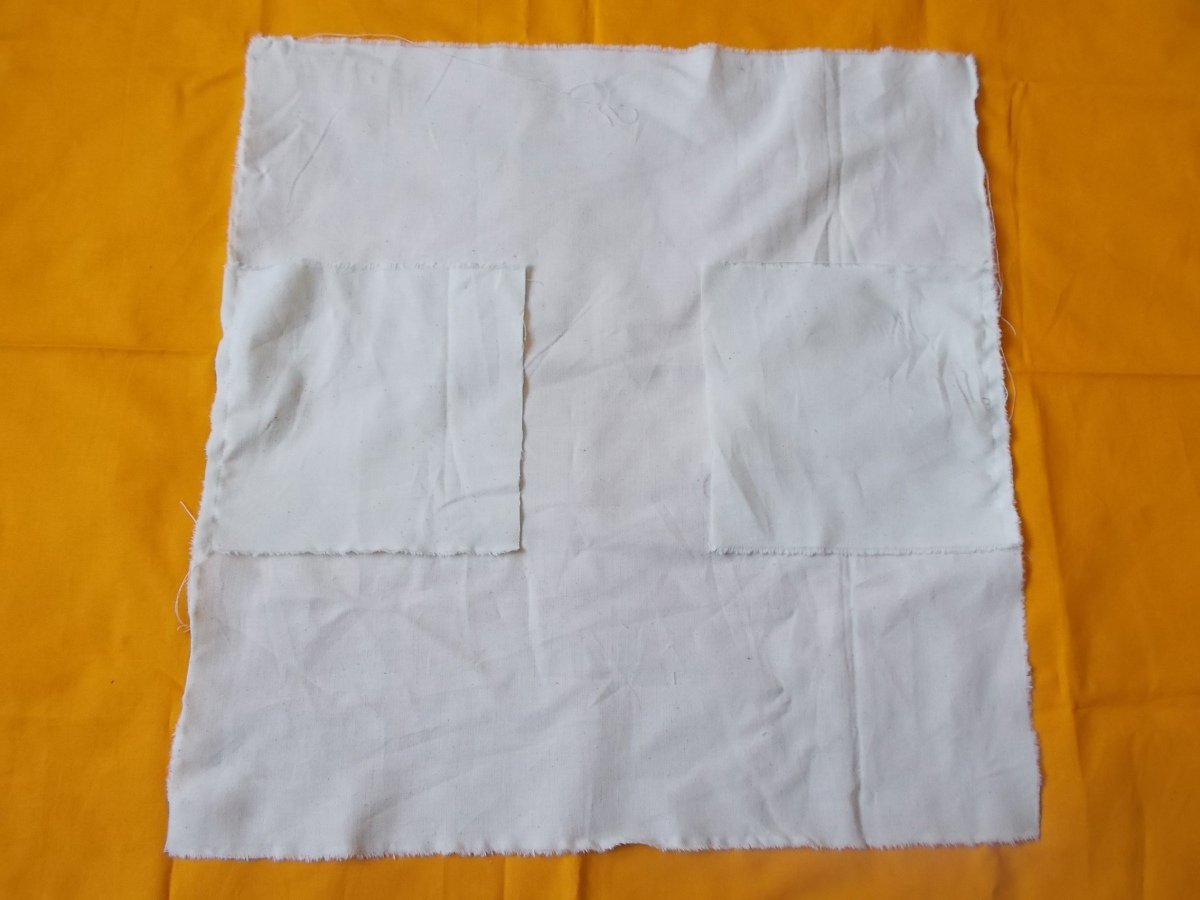
2. Now cut the top and bottom pieces for your organizer. The height of the small rectangle must be the same as the height you added to the left and right of your tools to the fabric. The width of the small rectangle ought to correspond to the width of your organizer. Cut the strip of fabric double the size again (it will be folded, one side acting as lining) – if you use different fabrics for the shell and lining, cut a rectangle each from the fabric for the shell and for the lining.


dscn2890


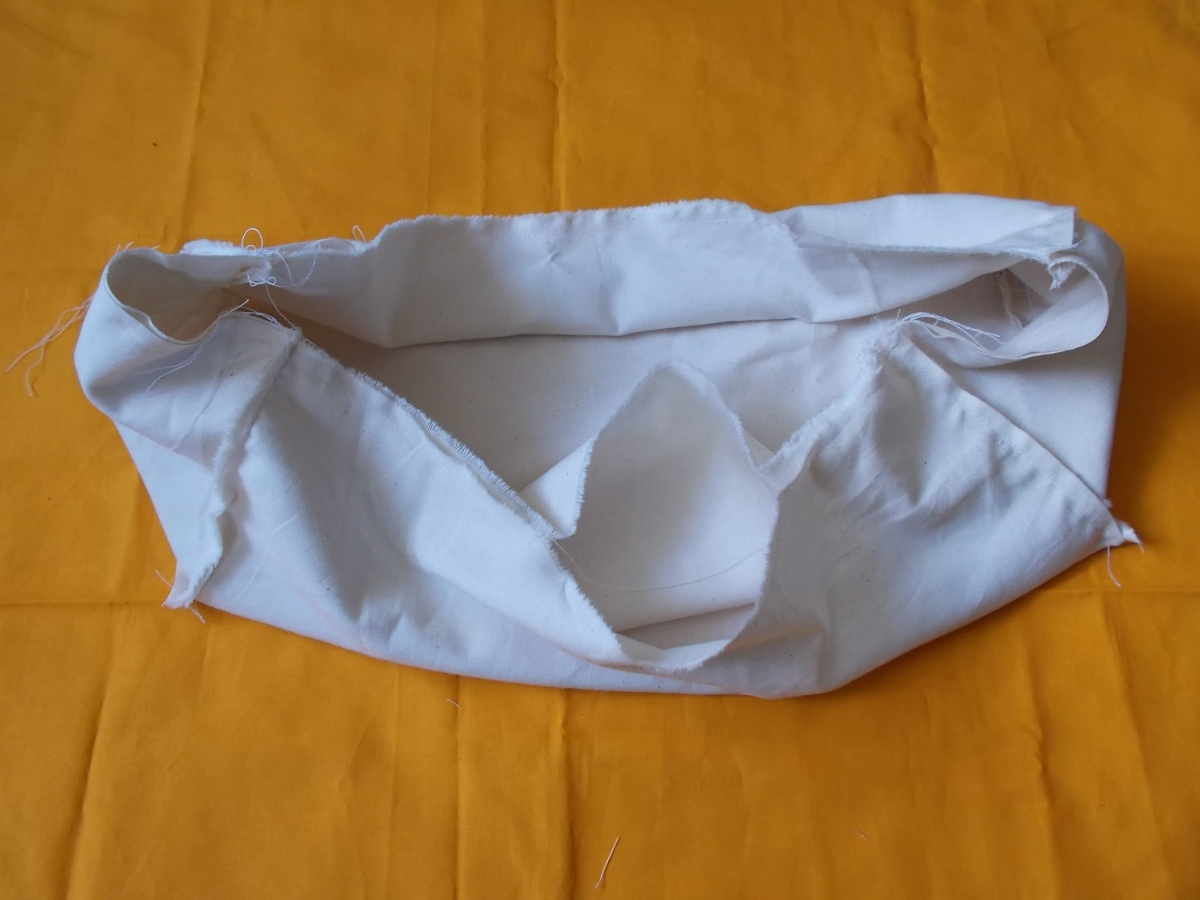
3. Now sew the top and bottom squares to the main body of your organizer. Repeat for the lining.

dscn2893

4. Now sew the sides of the small rectangles to the sides of the main body. Repeat with the lining.

dscn2896

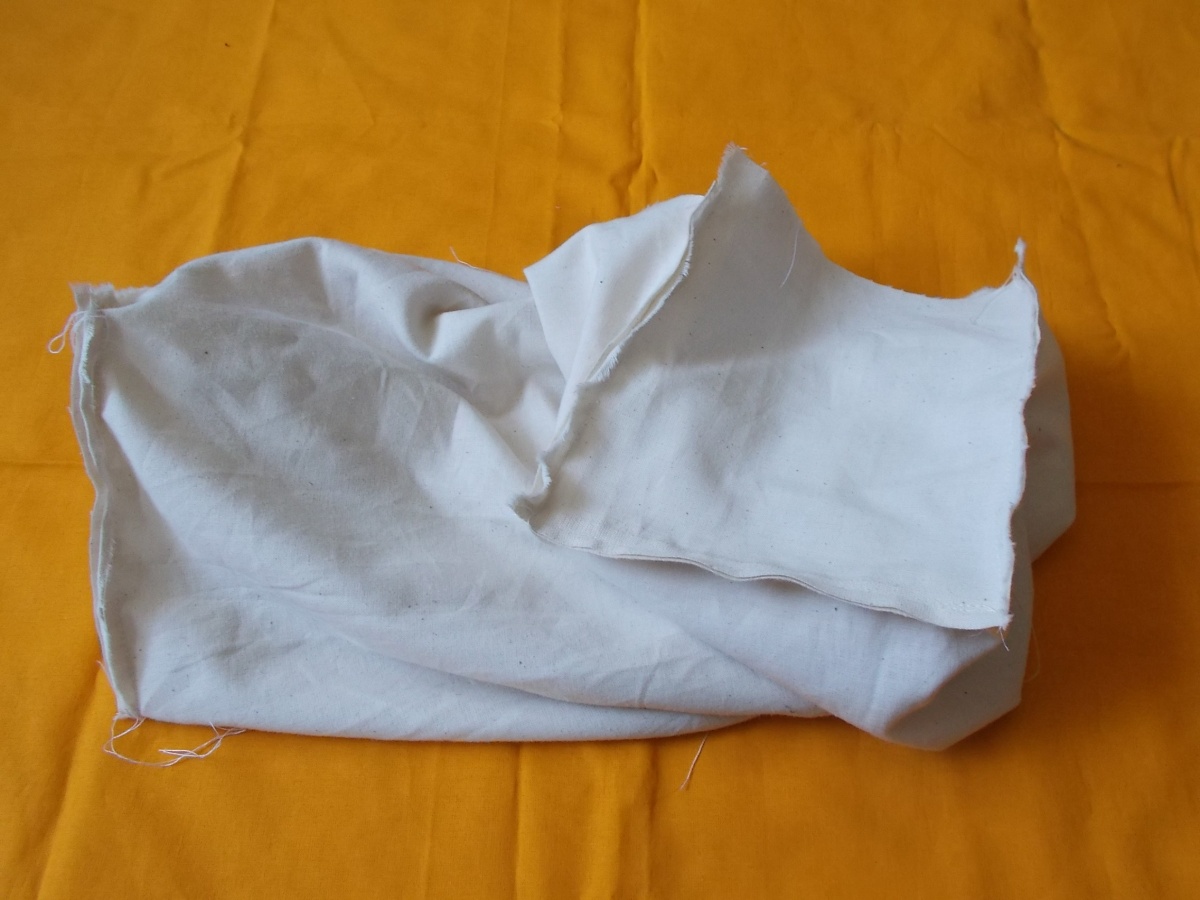
5. Put the two ‘containers’ inside each other – the seams must be on the outside!!

dscn2898

6. Sew the top edges of the two ‘containers’ together, leaving a slit open at one side.

dscn2901

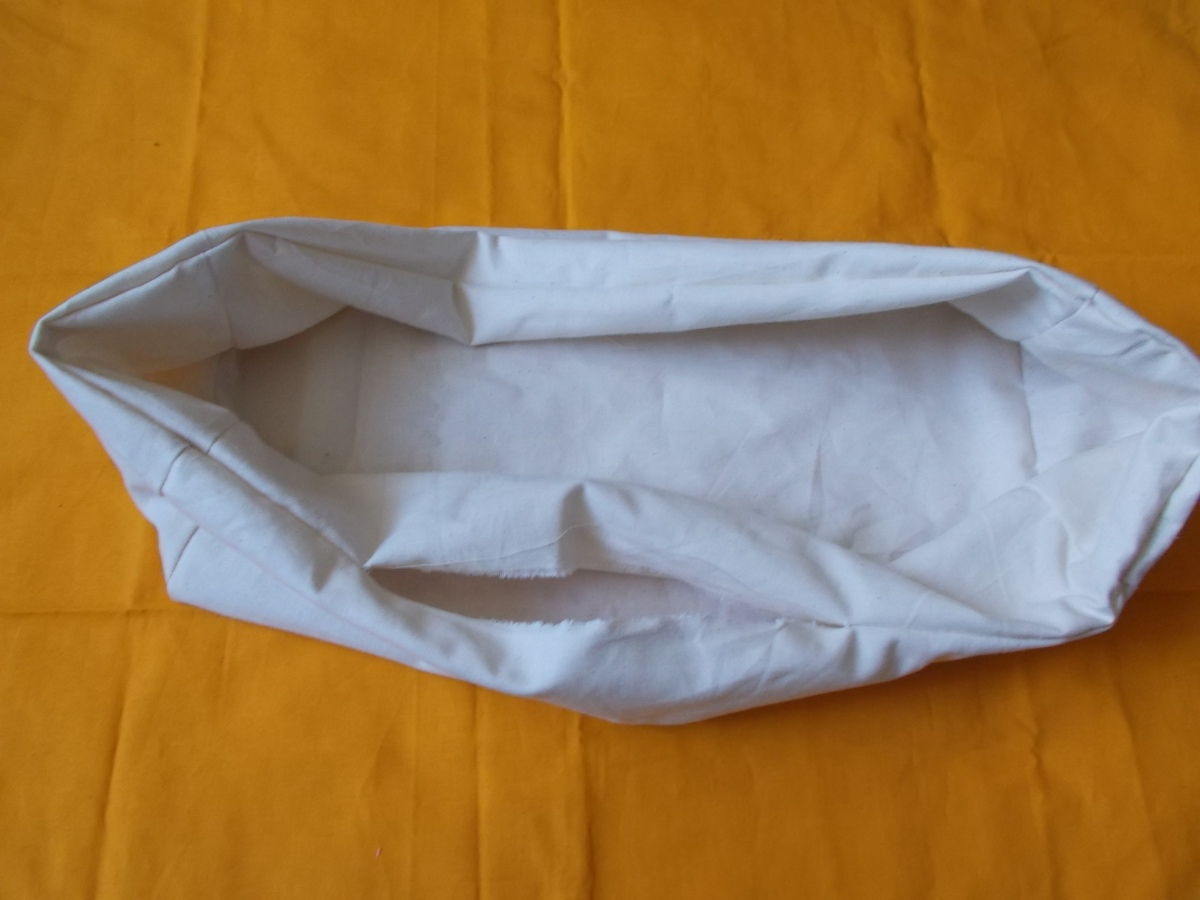
7. Turn the fabric inside out so that the seams are now on the inside. Sew the slit shut.

dscn2904

8. Your organizer is now almost finished.

dscn2912

9. For more stability and a better look, sew around the top edge of the seam once more (very close to the edge of the seam is best). Optionally and if you wish, you can insert pieces of cardboard in the size of the sides into your organizer for extra stability before closing the seam.

dscn2906

Close-up of the strengthened seam.

dscn2915

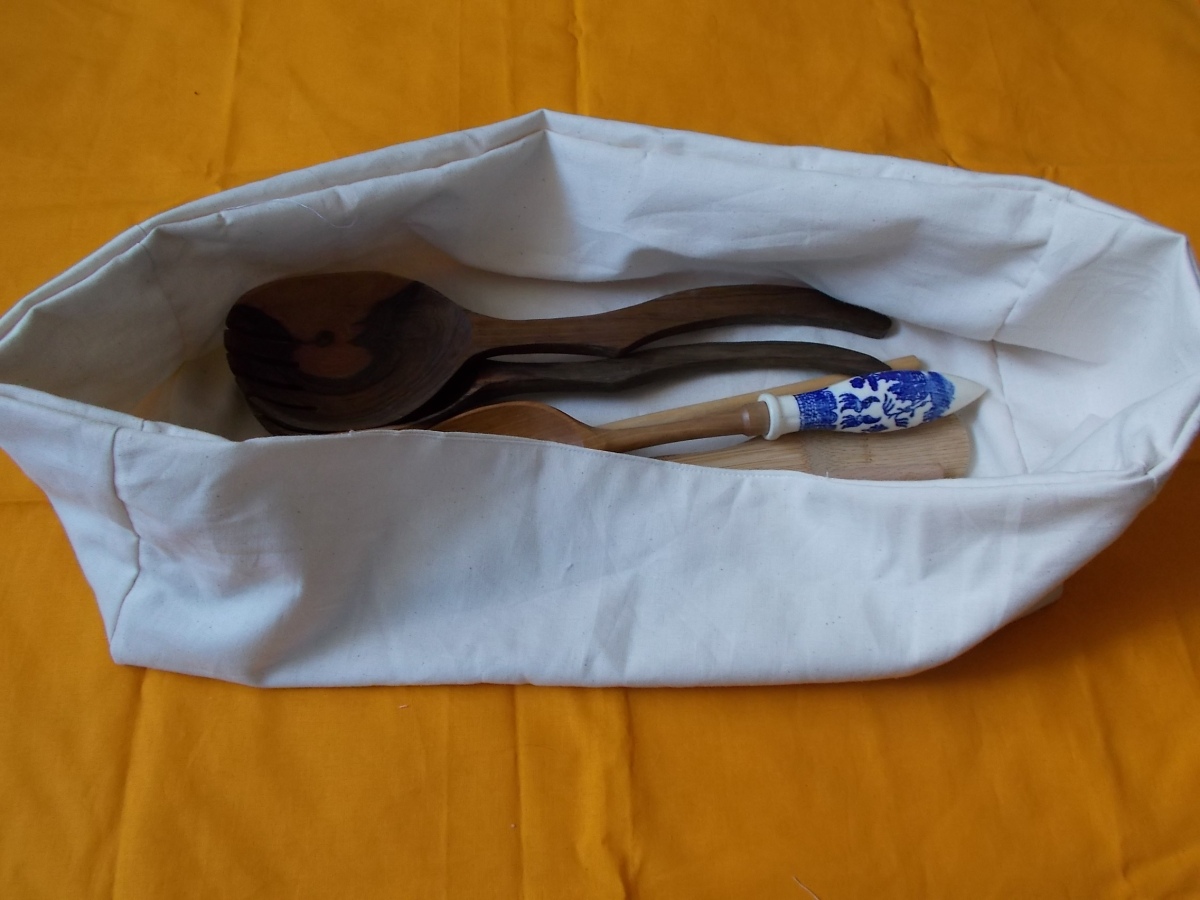
10. Your organizer is now ready.  If you find that the organizer does not hold your tools properly and is rather ‘loose’, you can also add some ribbons to both sides to hold the organizer together.

Upcycling Tutorial: How to make a turtle picture frame

DSCN2844

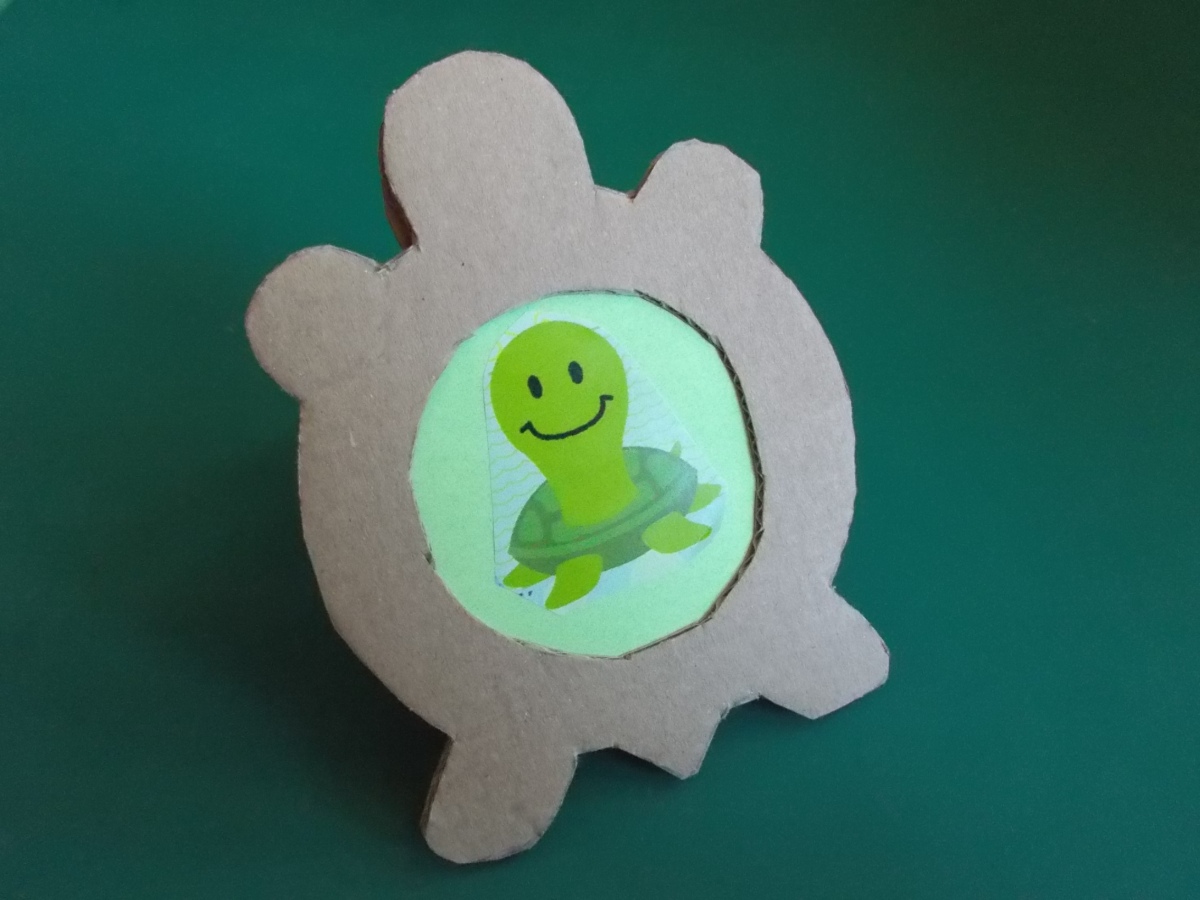
Today’s blog post will teach you how to make a turtle or tortoise picture frame from cardboard. 😀

You will need:

  • cardboard (enough for cutting out 3 turtle shapes per picture frame)
  • scissors and craft knife
  • glue and adhesive tape
  • pencil
  • paper
  • optional: gift wrapping paper or paint or something similar if you want to decorate your picture frame
  1. Draw a turtle shape on a piece of paper – pay attention that the turtle’s feet are on a straight line (this is where your picture frame will stand on!). Draw 2 circles inside the shell: the first, larger circle, is the size of your picture, the second innermost circle ought to be about 2mm/0.08inch smaller than your picture (so that your picture won’t fall out! 🙂 ). Cut out the turtle and draw 3 turtles on your cardboard – these will form the 3 layers of the frame.

2. Cut out the innermost circle. Lay the turtle on one of the cardboard turtles (the one you want to be the visible front layer of your frame) and draw in the small circle. Next, cut out the larger inner circle, and draw the larger inner circle on the 2 other turtles. You now ought to have one turtle with the smallest circle, and 2 turtles with the larger inner circle drawn inside.

3. Cut out the turtles, then cut out the inner circles with a craft knife. The turtle with the smallest inner circle will be your front piece.

4. Glue the three layers together – the turtle with the smallest inner circle ought to be the bottom layer. Keep one of the two larger cardboard circles you have cut out – this will be the back of your picture frame that protects your picture. Next you will need to make a stand for your picture: Take your turtle and put it on a spare piece of cardboard; draw around the semi-circle of the head; remove your turtle, then draw two vertical lines on both sides of the semi-circle so that you will have a strip with a rounded top. Cut out the strip. For a simple stand, your strip ought to have a length that is slightly shorter than the frame, so ideally, the strip ought to reach from the top of the head to just above the turtle’s tail. For extra stability, you can make your strip longer than the actual picture frame and then fold it into an L-shape just above the line where the tail starts. Glue the strip to the head (if you have an L-shaped stand, the bottom line of the L ought to face inwards towards the picture).

5. Your picture frame is now ready. If you want, you can decorate your frame, e.g. cover it with gift wrapping paper or painting it or gluing decorative elements to it. Insert your picture and cover it with the cardboard circle which you kept – fasten it with adhesive tape across the back circle. If you want to protect your picture, you can cut out a plastic circle out of some transparent plastic foil and put it inside the frame before you add the picture.


Urban farming: Growing food on a budget

urban farming toolsToday’s blog post is about urban farming and how to grow food on a budget as growing food does not have to be expensive. 🙂 You can grow some food virtually everywhere, even on the smallest windowsill or balcony, e.g. some herbs in pots on your kitchen counter or windowsill or some strawberries, which tolerate even north-facing and shady locations. There is not even any need to buy expensive pots or tools or even special seeds, nor any fertilizer! 🙂 Just take what you have at hand and use or repurpose it for gardening and growing some fresh organic, local crops.

Containers: You can take virtually any container you can find, e.g. the plastic boxes food is sold in in supermarkets, old plastic bottles whose top you can cut off and which you can hang between the slits of your balcony fence, plant pots of any type, old bowls or cups, or you can grow food in plastic or fabric bags filled with soil, etc. You can even grow food in baskets when you put a waterproof cover inside first 🙂 .

Seeds: You can either buy some inexpensive seeds, or you can simply take the ‘free’ seeds from inside the vegetables you buy at the grocery store, e.g. those inside tomatoes or bell peppers. 🙂 This is especially useful if you buy organic vegetables and fruits anyway, because then you can be sure that the seeds have not been tempered with or been modified somehow. If you buy seeds, pay attention that you don’t buy ‘F1’-varieties, because you won’t be able to save seeds from the veggies you grow then, because the plants you grow from them would not have the same properties as the parent plant. (If you don’t care about the properties of the parent plant variety you can use them for growing new plants, of course). Choose organic seeds or heirloom seeds wherever possible. They are – often considerably – more expensive, unfortunately, but they will contribute to maintaining biodiversity and counteract the homogenization of seeds because nearly all conventional seeds sold are of the same varieties nowadays, and are produced by just a few very big seed producers. Much biodiversity was lost because of this, about 80% of heirloom seeds or even more that were perfectly adapted to different climatic conditions….

Growing food from scraps: Another ‘free’ method of growing food is to regrow it from food scraps. You can take virtually take any ‘bottoms’ from veggies that have still the remains of roots on them, e.g. onions, garlic, shallots, leeks, lettuce, etc. Just take the bottoms and put them into the soil, and they will regrow roots and produce greens again, which you can then harvest 🙂 . You can even grow pineapples in pots: just put the green top in a glass of water until you see it regrowing roots, then transplant it into a pot with soil 🙂 . You can even get a ‘second helping’ from chicory stalks: even though they won’t regrow roots, if you lay them in a pot of soil *lengthwise* and cover them lightly with some dirt, they will produce some new green leaves which you can harvest before they die off (caution: if you put them into the soil upright, they will just rot!)

shallots regrowing from scraps

Fertilizing your plants: You can use old coffee or tea grounds as a fertilizer, just put it on the soil around your plants. Another method is to water your plants with tea occasionally, e.g. nettle tea or camomile. Or pour your old coffee into your plants. 🙂 If you have a fish tank, you can take its water to fertilize your plants with its dissolved nutrients. Likewise, when you wash your lettuce or salads in a bowl, don’t pour away the greenish water into the drain but water your plants with it. If you eat organic bananas, you can chop up their peels into small pieces and mix them into the soil around your plants. Also mixing in some scraps of brown paper or cardboard into the soil  from time to time can help keep your plants and soil fertile.

Space: You don’t need to have a lot of space for urban farming either – just use any available space you have at your disposal, e.g. your balcony, windowsills, kitchen counter, a roof, etc. Also think about all the space you have, which includes the air space above any pots: you can easily hang up some growing baskets from the ceiling and grow some low plants, like herbs or strawberries, or some vines, like e.g. cucumbers, in them. Or put up some trellises on the walls and grow some beans or similar vines. If you have a small tree or other plant that grows on a stem, you can grow lower plants, like lettuce, herbs or strawberries, in the soil around the stem in the same pot. Use companion planting to find plant combinations that grow well together in a location.

Tools: You don’t need to invest in any special tools either if you just cultivate some containers – just repurpose some objects or tools you already have. For example, you can water your plants with any container that holds water, e.g. old bottles or cups, buckets, and you can dig in the earth using old cutlery like spoons or forks or use a small bowl for moving larger amounts of soil. You can use small, old dead trees or branches as trellises or any sticks you can find, or you can put up some strings for your vines to hold onto. 🙂

strawberries

Zero Waste: Office

DSCN0280

Today’s blog post is about a very important topic, namely waste created in offices, and how to avoid it and what products to use instead.

The first rule to avoid creating unnecessary office waste is to use reusable products with long durability made from natural materials and to use recycled products wherever possible. Unfortunately, eco-friendly products usually aren’t sold in most High Street stores or they offer only a limited product range of eco-friendly products, so your best bet to get hold of eco-friendly office supplies is the Internet. There are a variety of online suppliers specializing in eco-friendly office materials, which you ought to find via a google search.

Here are the dos and don’ts of sustainable office supplies:

1. The first tip ought to be a no-brainer, namely use recycled paper for your printer and for your writing pads, and always use both sides of paper (e.g. use the backside of printed paper for making notes or drafting ideas or mind-maps). Only print out emails and documents if absolutely necessary, and if you print a large number of the same document (e.g. handouts), make a test print first to check for typos.

2. Telephoning: Reuse old paper for taking notes. You can easily make your own note paper by using paper that has been printed on on one side and by cutting it into neat squares. Place these beside your phone.

3. Buy refilled ink cartridges. Brand-new ink cartridges have a very high carbon-footprint since they are made from a huge amount of oil, but if you buy refilled cartridges, less resources are used.

4. Use office supplies made from wood or metal, instead of products made from plastics. There is a large variety of products on the market, as you can see in the photo above. Opt for ballpoint pens made from wood or metal which can be refilled and choose leads made from metal as these can be recycled. Prefer a refillable mechanical pencil, ideally made from wood or metal, over an ‘ordinary’ wooden pencil, as it uses much fewer resources (no need for new trees to be felled!). Buy refills packaged in little glass tubes for your mechanical pencils. If you can, use an ‘old-fashioned’ fountain pen with a converter and fill it with bottled ink. This is the most eco-friendly manner of writing as it doesn’t create any waste from metal refills. Refuse to accept plastic ‘freebies’, like plastic pens commonly given out at conferences, trade fairs and in hotels (apart from being made of plastic, these are usually of low quality and often cannot be refilled or require very expensive ‘special-size’ refills which the free, often ugly pen isn’t worth investing in!)

5. Instead of using toxic plastic textmarkers, use wooden textmarkers, which look like fat colored pencils and are available in bright neon shades. (You can see them in the photo above) These may be more expensive than the toxic variant but they will last for much, much longer.

6. Use pencil sharpeners made from wood or metal, and PVC-free erasers (avoid products containing PVC at all costs, since it is one of the most toxic materials that exist and which releases its toxins over its entire lifetime). Use rulers made from wood.

DSCN0276

7. Avoid using tape made from plastic (often made from PVC!). Instead, use paper tape for parcels, which can be quite sturdy and is often strengthened with integrated string (the brown roll of paper tape in the photo). Or alternatively, tie your parcels with string. Reuse old envelopes, by simply attaching a new label. If you feel embarrassed about doing this, add a small written message like “Reusing envelopes and packaging is not a sign of meanness or stingyness, but a sign of environmental awareness and consciousness”. These messages are sometimes also available as rubberstamps and offered by some companies. Use shredded paper or old newspaper to wrap fragile goods and objects. Use (large) envelopes made from 100% paper, which also have padding made from paper fibres instead of plastic bubble-wrap.. For ordinary letters, use envelopes made from recycled paper. For your private mail, you can also make your own envelopes from magazine pages or from old maps, etc.

8. Instead of using plastic tape, use paper-tape which is water-activated (the white roll of paper tape in the photo). Just cut off a length of tape and dampen its backside with a bit of water – use as you would ‘ordinary’ plastic tape. You can even write on it! 🙂 It is quite sturdy and will serve its purpose just fine.

DSCN0515

9. Instead of using staples, which are too small to be recycled, use paper clips instead. Opt for paperclips made from metal only, without a plastic coating (the plastic coating prevents recycling!). Or use a ‘staple-less’ or ‘staple-free’ stapler (you can see one in the photo above). The staple-free stapler will punch a small hole into your sheets of paper and will hold up to 4 sheets together. Alternatively, punch a hole into your sheets and tie them neatly with a piece of string.

DSCN0516

10. Use office folders made from paper only, i.e. without a plastic coating which prevents them from being recycled. Use paper folders wherever possible instead of plastic folders. You can even make your own by folding a piece of sturdy cardboard in the middle 🙂 and by optionally crafting some side flaps from the same material and gluing them into your folder.

11. Use solvent-free glues and ideally opt for a product for which a large refill-bottle is sold.

12. Computers and media storage: use reusable memory sticks, or external cloud storage, like e.g. Dropbox, to eliminate the need for CDs. If you have to use a CD, opt for rewritable, and therefore reusable, CD-RWs.
Zero Waste & sustainable Gift Wrapping

eco gift wrapping turtles

Today’s blog post is about how to avoid the totally unnecessary waste that usually comes with giving gifts. I am always shocked how many precious resources and materials are thrown away after a holiday or celebration that involves gifts, which have been used only once and which often cannot even be recycled. So here are a few things you can do to avoid this waste, but nevertheless have beautifully wrapped presents:
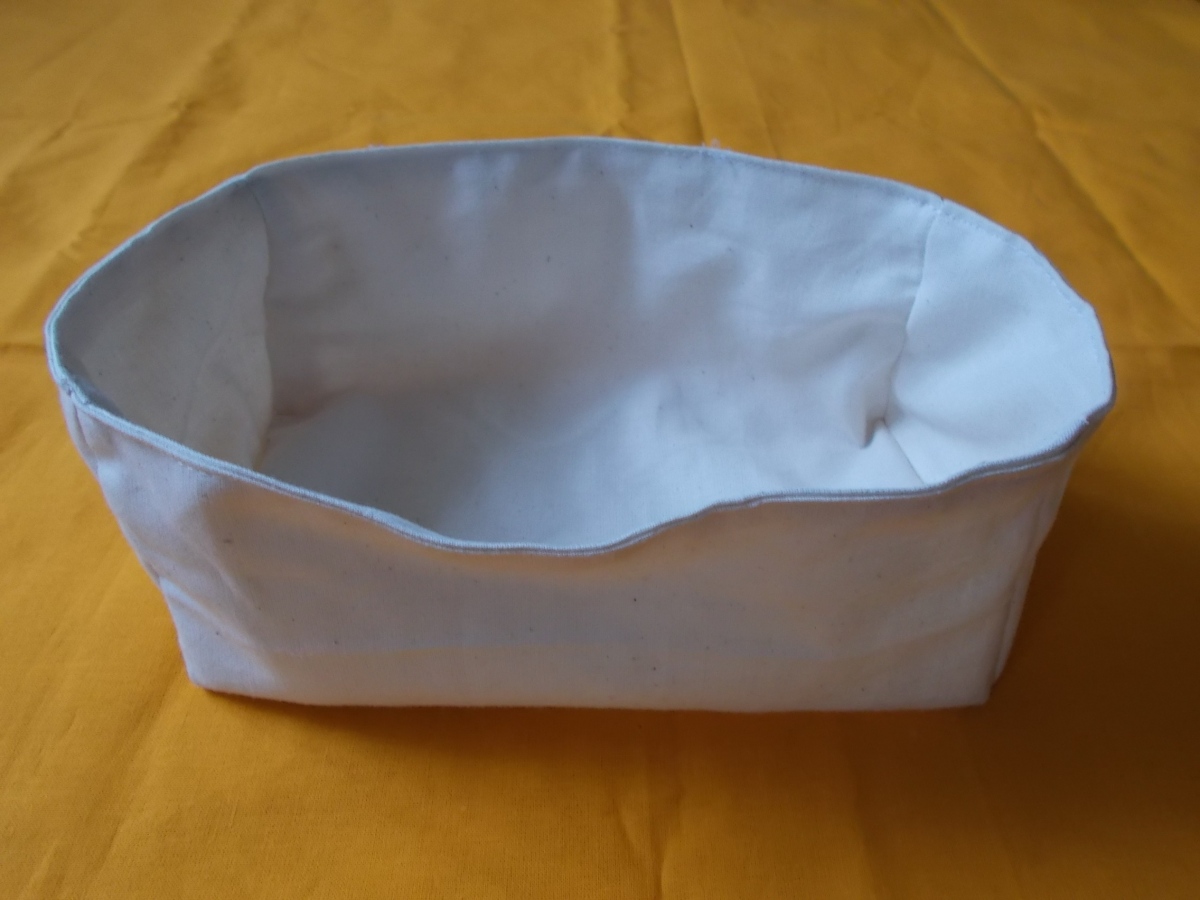
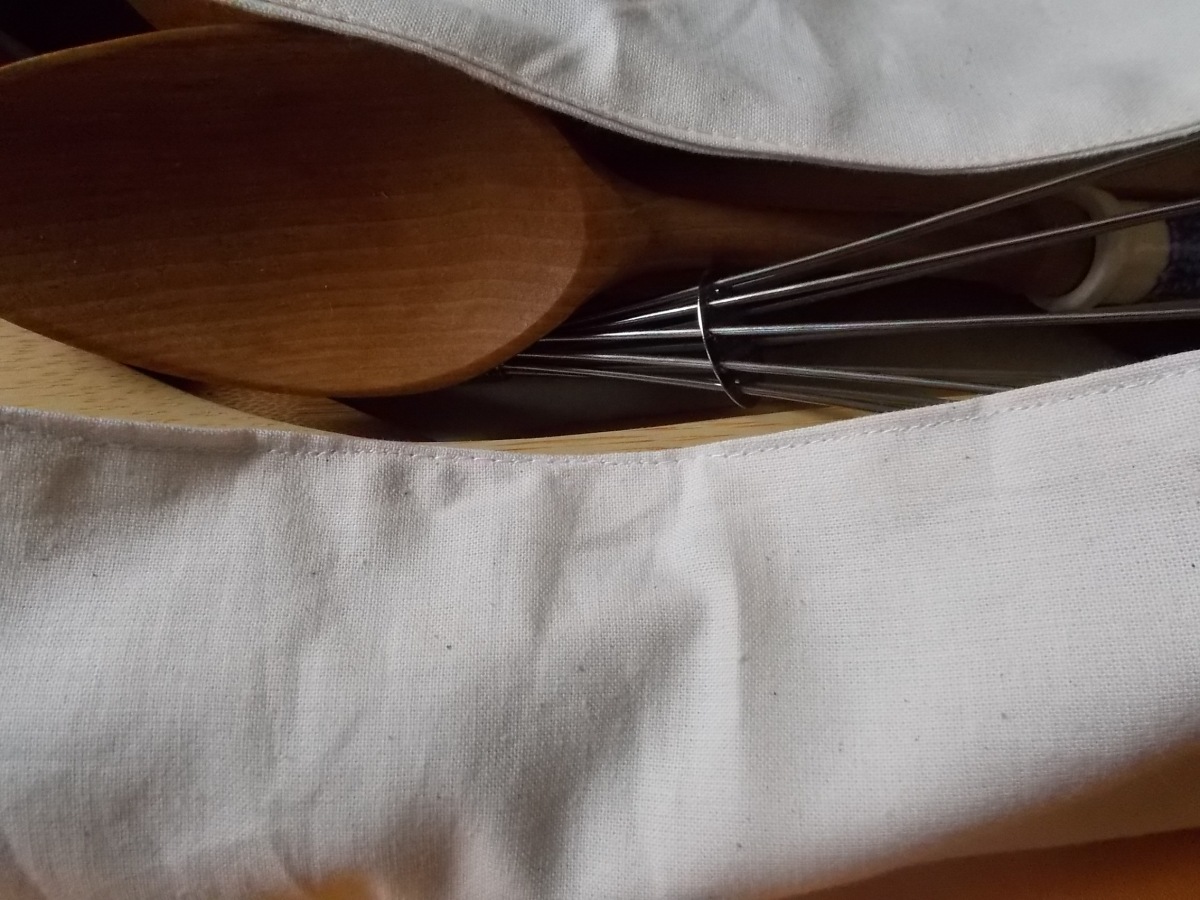
1. A good way to wrap gifts is in a piece of fabric or scarf, which can be reused dozens of times. The Japanese have special folding techniques for these fabrics, called furoshiki. (Folding instructions for these can easily be found via a google search). But you can also simply use an ordinary piece of cloth and tie it with a nice textile ribbon.

2. Make the wrapping part of your gift! 🙂 For example, if you give someone a book and a shirt for a present, simply wrap the book into the shirt and tie with a nice textile ribbon. (Textile ribbons can be reused dozens of times, whereas those made of plastics cannot be reused or do no longer look nice after a few uses).

3. Pack your gift into an inexpensive textile shopping bag and give it as part of your present. The bag might still be used long after your original present is forgotten. You can also use a small towel, e.g. a beautiful tea or kitchen towel, or dishcloth for that purpose.

4. Pack your gift into gift boxes that can be reused dozens of times or used as storage boxes. You can even make them yourself by taking a nice cardboard box and gluing beautiful gift wrapping paper on it. Reusable gift bags are another option, which you can either purchase or make yourself.

5. If you find that you absolutely have to use paper, opt for one made from 100% recycled paper or wrap your gifts in photo-pages taken from magazines, or reuse old gift-wrapping paper that is still in good condition. Do not use tape to close it as this often prevents the paper from being reused. Instead, use a textile ribbon or a piece of wool, twine or string to tie your gift.

6. Ask yourself if your gift really needs wrapping at all. Some things can simply be ‘wrapped’ by tying a ribbon around them, e.g. a stuffed animal or a garment like a pullover.

7. Things to avoid: Avoid gift wrapping foils made from plastic or ‘aluminium’ – these are the worst kind of packaging materials available since they have a large carbon footprint in production and cannot be recycled. Likewise, avoid any paper that has glitter or other decorative materials printed on it or attached to it, since this prevents the paper from being able to be recycled.  Avoid ribbons made from plastics – these cannot be reused or look ugly after a few uses and mostly cannot be recycled. Do not use gift tags unless you absolutely need them – they just create unnecessary waste. If you feel you do need to use tags, try to make them from old holiday cards you got, or from cardboard.

8. Things to use instead: Use textile ribbons which can be reused dozens of times. You can also cut up an old T-shirt or garment to make ribbons from it 🙂 . Another good option is to use colorful threads of wool (cotton yarn is best, as this is a ‘natural’ material that can be composted, whereas many types of knitting wool are made from petroleum-based materials like polyester or acrylic – not very ‘ecological’ and these do not break down when being discarded! However, even wool made from these materials is preferable to plastic ribbons since the wool threads can be used for other purposes). Paper ribbons or ribbons made from raffia are another good option since they, at least, can be recycled. Or simply use twine, which can also be very attractive. If you feel you need gift tags, try to use dried leaves (or fresh leaves) as a label or make them yourself from old cards or cardboard. You can also use a pebble or small stone as a label 🙂 (wrap it with a piece of string to attach it to your gift). If you want to decorate your gift, try to use beautiful twigs, flowers, leaves or spices like cinnamon or star anise for it.